


Why Your Windows Are Bleeding Money Every Winter

Imagine this: It's the middle of January, you're wrapped in a blanket, yet you can still feel that winter chill. You bump the thermostat up, but your heating bill just keeps going up. The problem? Your windows might be the sneaky culprit. I’ve spoken with energy auditors, and leaky windows are a constant source of wasted energy.
Those little gaps and cracks around your windows might seem small, but their impact isn't. It's like having a small hole in your wallet – money constantly leaking out. These tiny openings let all that warm air escape, making your furnace work harder and longer. You're basically throwing money out the window – quite literally. You might even feel a draft or notice cooler temperatures near your windows – those are sure signs of air leaks.
And here’s the real shocker: Studies show you could be losing up to 30% of your home's heat through your windows. Properly sealing them up for winter can cut that loss by 10–15%, putting real money back in your pocket. Want to learn more about sealing and saving? Check out this resource: Door and Window Border Seal.
Different types of windows lose energy at different rates. Older, single-pane windows are the biggest offenders. Newer double- or triple-pane windows with low-E coatings do a much better job insulating. But even new windows can develop leaks from settling, weather damage, or even just being installed incorrectly. Here's a helpful guide on sealing windows and doors for a more comfortable home: Window and Door Sealing Tips for Better Home Comfort. Checking your windows for drafts will help you decide which ones need immediate attention and which can wait, giving you the most value for your sealing efforts.
Materials That Actually Work When The Temperature Drops
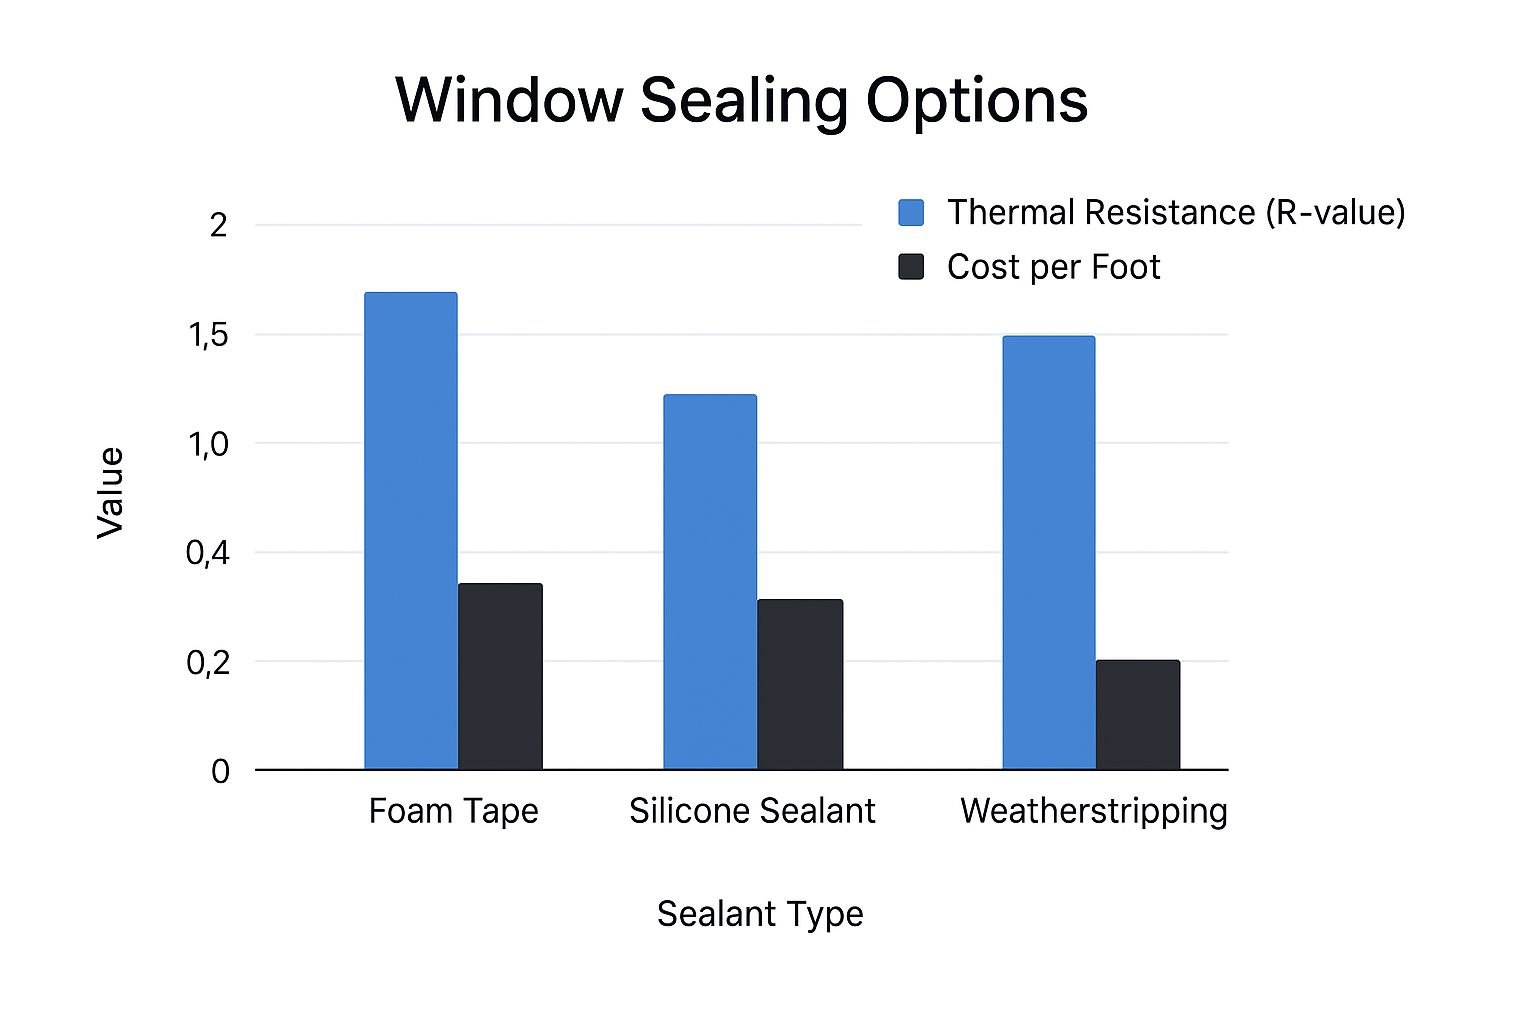
The chart above gives you a quick comparison of R-value and cost for foam tape, silicone sealant, and weatherstripping. Silicone sealant definitely wins for thermal resistance, but you'll pay a bit more. Foam tape is budget-friendly, but doesn't insulate as well. Weatherstripping lands somewhere in the middle, offering a good balance. This lets you choose what works best for your wallet and how much insulation you really need.
Let's bust some myths about window sealing. You might think those expensive polymer seals are the ultimate solution. Honestly, I've seen them crack and peel after a single winter. Simple foam strips, surprisingly, can be incredibly effective, especially for those drafty gaps around window frames. I remember sealing a drafty old casement window with basic foam strips. Super cheap and it worked perfectly.
Choosing The Right Seal For Your Windows
V-strips are a fantastic choice for sliding windows and doors. They create a tight seal against both vertical and horizontal surfaces. One thing to watch out for – they can be a pain to install if your window frames aren't perfectly straight.
To help you choose, let's look at some common window sealing materials:
| Material Type | Durability (Years) | Cost Range | Installation Ease | Winter Performance |
|---|---|---|---|---|
| Foam Tape | 1-3 | $ | Easy | Fair |
| Silicone Sealant | 10+ | $$ | Medium | Excellent |
| Weatherstripping (Rubber) | 5-7 | $ | Easy-Medium | Good |
| Weatherstripping (Felt) | 1-2 | $ | Easy | Poor |
| V-Strip | 5+ | $$ | Medium-Difficult | Excellent |
This table summarizes the key characteristics of each material, allowing for a quick comparison of durability, cost, and performance. As you can see, silicone offers the best long-term value despite the higher upfront cost. Felt weatherstripping is the cheapest, but you'll be replacing it often.
Want to really dive into winterizing your windows? Check out this helpful guide: How to Winterize Windows: Easy Tips to Save Energy. Knowing what documents you need can help you understand the potential savings. This home loan document checklist can be a good starting point. Weatherstripping comes in a variety of materials, too, like felt, rubber, and foam. Felt is the most economical but wears out the quickest. Rubber and foam offer better durability and insulation.
Installing Seals Without Losing Your Mind (Or Your Weekend)
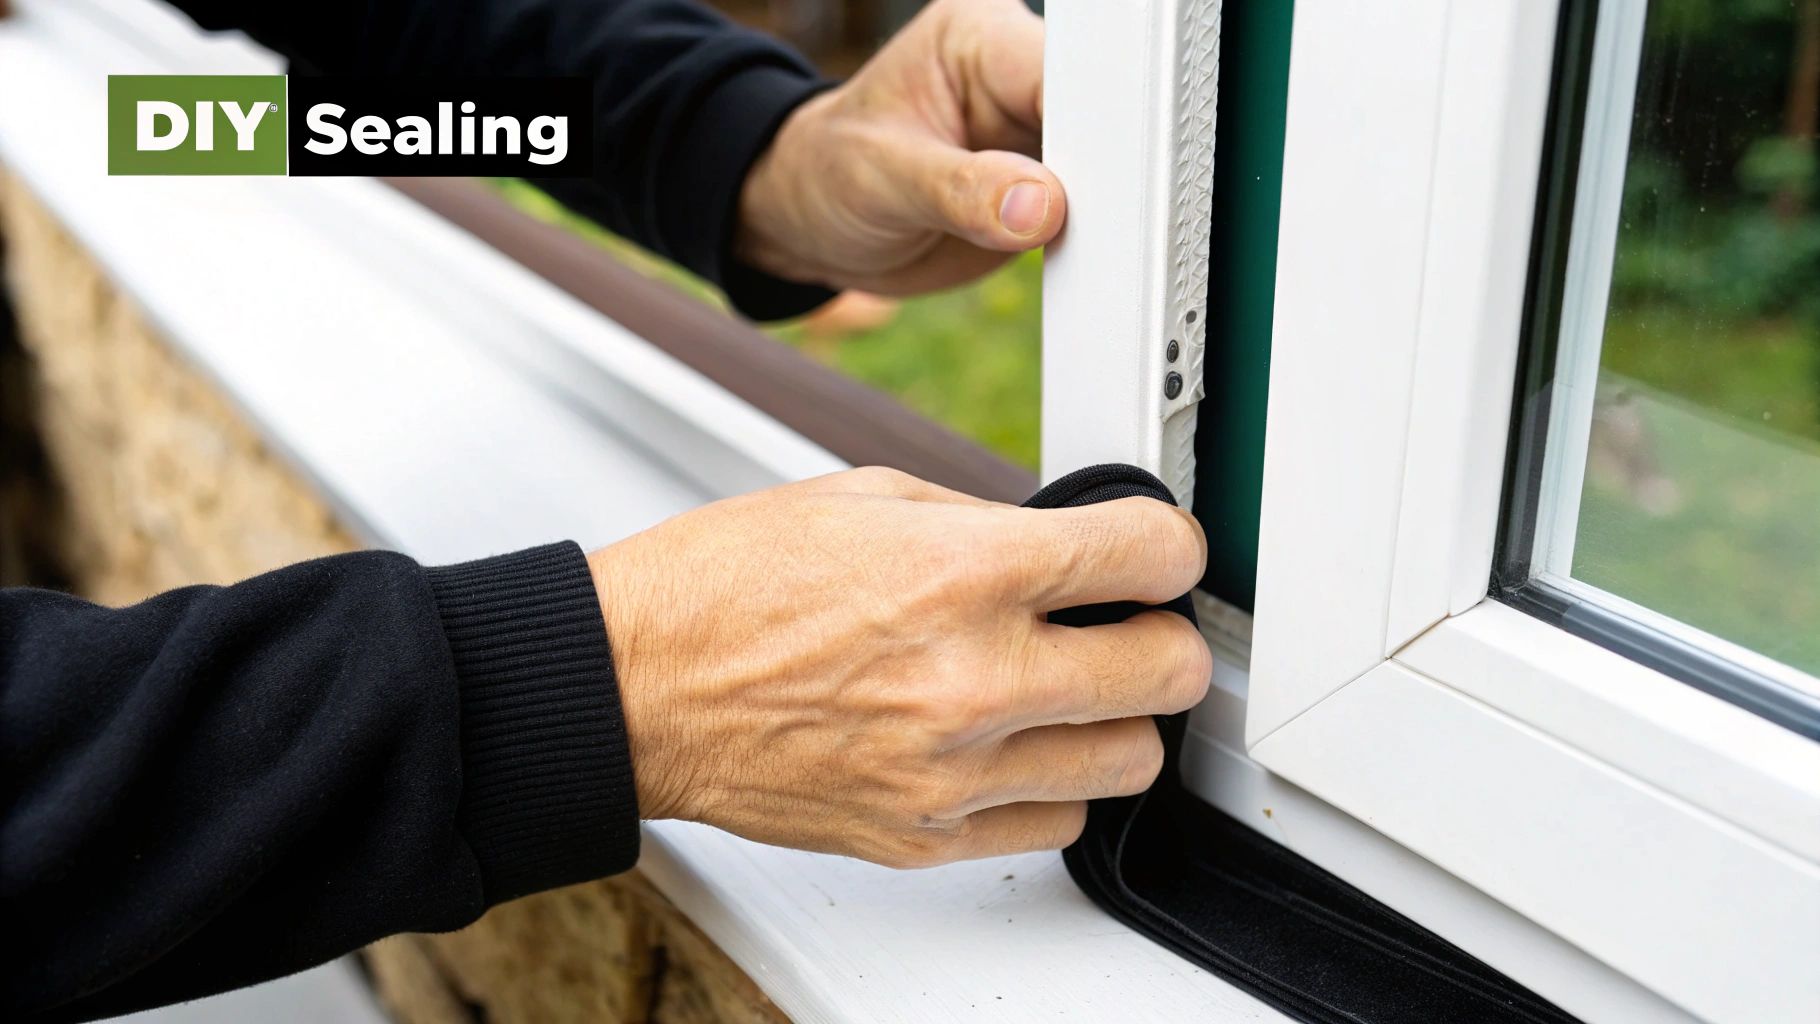
So, let's talk winterizing your windows. Specifically, sealing them up tight. It's not rocket science, but doing it right the first time can save you a lot of headaches (and maybe a trip to the hardware store). The biggest thing I've learned over the years? Surface preparation is everything. Seriously, clean those window frames like you mean it. I've made the mistake of skipping this step, and trust me, seals just won't stick to dusty or greasy surfaces. A quick wipe-down with rubbing alcohol does the trick.
Handling Common Installation Challenges
Next up, the golden rule of any DIY project: measure twice, cut once. This is especially true for window sealing. Most window frames aren't perfectly square (mine certainly aren't!), so you'll need to adjust your measurements as you go. Don't be afraid to trim the sealing material – it's better to have a slightly shorter piece than one that's too long and buckles. Want to make winterizing windows a bit more fun, especially if you have kids? Use colorful seals or find some winter-themed activities to do alongside it. Check out these Free Winter Coloring Pages for some ideas.
What about those windows that are painted shut? Been there! A hairdryer on a low setting can soften the paint enough to make it easier to open them without damaging anything. Just be careful not to overheat the glass.
Tips for a Smooth Installation
The right tools can also make a world of difference. A sharp utility knife is a must for getting clean cuts. And while a caulking gun (caulking gun) makes applying sealant a breeze, you can usually manage smaller jobs with a putty knife and your finger (just wash your hands afterward!). For more tips on dealing with drafts, check out this helpful article: Top 8 Window Draft Solutions for 2025. Oh, and one more thing: safety glasses! Bits of sealant can sometimes fly around, so it's better to be safe than sorry.
Finally, be realistic about how long this project will actually take. Sealing a couple of standard windows might only take an hour or two. But older windows, oddly shaped frames, or a whole house full of windows? That could easily take a weekend. Don't rush it! Take your time, and you'll be much happier with the results. Remember, patience is the key to a professional-looking finish, even without professional equipment.
Conquering Problem Windows That Defy Standard Solutions
Let's be honest, some windows just seem to fight back when you try to seal them for winter. I've battled my fair share of quirky vintage casements and frames that have seen better days, and trust me, standard fixes don't always cut it. If you're dealing with oddly shaped windows, those massive multi-panel monsters, or frames that have warped over time, you're in the right place.
Thinking Outside the Box for Tricky Windows
Over the years, I've picked up some clever tricks from fellow renovators for seemingly impossible sealing jobs. For those multi-panel windows, try mixing and matching. Foam strips work wonders for the smaller cracks, while V-strips tackle the larger gaps. This tag-team approach can create a surprisingly effective seal. You might find this helpful: Stop Window Drafts: The Ultimate Guide to a Warmer Home. If your frames have shifted and left you with uneven gaps, a flexible sealant is your friend. It's a little more elbow grease, but the airtight result is worth it.
Sometimes, you don't want a permanent solution. For windows you need to open and close during the winter, removable magnetic strips or clear plastic film can be lifesavers. They offer decent insulation without being a hassle.
Innovative Solutions for Stubborn Problems
Don't be afraid to get creative and combine methods. I had one particularly stubborn window that was drafty and prone to condensation. My fix? Foam strips for insulation and then a clear sealant over the top to create a vapor barrier. Double duty! It's interesting to note, demand for window sealing products is always strong. Retailers often see a 40-50% sales spike between September and November as winter approaches. For more market info, check out the Door and Window Border Seal Market here.
If you're still wrestling with a problem window, look for innovative products. Self-adhesive silicone seals are incredibly easy to use and conform to just about any shape. For those really stubborn gaps, expandable foam sealant can be a lifesaver (though be ready for a bit of a mess). Remember, even the most challenging windows can be sealed with the right approach. You've got this!
Fixing What Goes Wrong (Because Something Always Does)
Let's be honest, even the best-laid plans for winterizing your windows can go sideways. It happens! I've been there, trust me. From my own DIY mishaps to chats with seasoned contractors, I've learned that hiccups are just part of the process. So, let’s talk about some common snags you might hit and how to get things back on track.
Rescuing Your Seals (When They Just Won't Stick)
We've all wrestled with stubborn window seals that refuse to adhere. Nine times out of ten, the culprit is surface prep. Even a tiny bit of dust or leftover cleaner can sabotage your efforts. I once spent an age fighting with V-strips, only to realize a barely-visible film of cleaning residue was the problem. A quick wipe with rubbing alcohol is usually your best friend here. Temperature also plays a role. Some sealants just don't like the cold. If you can, try warming the area with a hairdryer (carefully!) or opt for a low-temperature sealant.
Bridging the Gap (When It's Bigger Than Expected)
So, you've got a gap that's bigger than your sealant can handle. Don't worry, I've been there too. One trick is layering. Start with foam backer rod to fill the bulk of the gap. Then, top it off with sealant for a smooth, airtight finish. This combo provides great insulation and a really effective seal. For more insulation tips, check out this guide: How To Insulate Windows: Complete Guide to Energy Savings. Another workaround I've used is cutting small pieces of foam insulation board to fit the gap and then sealing around the edges.
Tackling Condensation (The Unexpected Side Effect)
Sometimes, after all that sealing, you end up with condensation. This can happen because the airtight seal traps moisture. Good ventilation is key. Make sure your exhaust fans are working properly, and crack a window now and then to let the moisture escape. If condensation is still a problem, a vapor barrier on the inside of your window frame might be the solution. A clear sealant can do the trick without blocking your view.
Before we wrap up, let's talk about a few common window sealing problems and their fixes. This little table should come in handy:
Common Window Sealing Problems and Solutions Quick reference guide for diagnosing and fixing the most frequent sealing issues homeowners encounter
| Problem | Likely Cause | Quick Fix | Prevention Method |
|---|---|---|---|
| Sealant won't stick | Dirty surface, extreme cold | Clean surface with rubbing alcohol, use low-temperature sealant, warm the area | Thoroughly clean surfaces before applying sealant, choose appropriate sealant for temperature |
| Gap too large for sealant | Large gaps in window frame | Use backer rod and sealant, fill with foam insulation board | Properly measure gaps before purchasing materials |
| Condensation | Increased humidity due to airtight seal | Improve ventilation, install vapor barrier | Ensure proper ventilation after sealing, consider installing vapor barrier during installation |
This table highlights some quick fixes and, even more importantly, how to avoid these issues in the first place.
The difference between a window sealing job that lasts a few months and one that lasts for years? Proper installation and regular upkeep. Inspect your seals every year. Look for cracks, gaps, or worn sections. Replacing a failing seal is almost always better than patching it up. By addressing these common problems and being proactive, you'll keep your windows sealed tight and your home cozy all winter long.
Understanding The Industry Behind Better Sealing
The window sealing world is constantly changing. With everyone focused on saving energy these days, there's a lot of innovation happening with sealing materials and how they’re installed. This means more choices for you, but also prices that can jump around. Knowing what’s going on in the industry can really help you find the best deals.
New Technologies Making Their Way to Your Home
Have you heard of self-healing seals? I first saw these used in cars, but now they're showing up in products for houses. They’re pretty cool – they actually close up small gaps and cracks on their own, which makes your seals last way longer. Advanced polymers are another big deal. They're much tougher and insulate better than older materials, especially when it comes to handling those freezing winter temperature swings.
Timing Your Purchases for Optimal Savings
Window sealing is definitely seasonal. Everyone wants to seal up their homes before winter, so demand (and prices) goes up in the fall. Selection can be limited then too. My advice? Shop in late summer or early fall. You'll find better deals and more options. Plus, you’ll beat the rush and get installation scheduled exactly when you want it. It’s interesting to note that window sealing is a small but growing part of the larger window and door frame market. This market hit over USD 105 billion globally in 2024 and is expected to grow at a rate of over 3.6% each year until 2034. You can find more info about this market here.
By keeping these industry trends in mind, you can pick the right materials, shop smarter, and get the most out of your window sealing project. That means a warmer house and more money in your pocket all winter long.
Your Winter-Ready Action Plan That Actually Works
So, we've talked about the ins and outs of sealing your windows for winter. Now, let's make a plan you can actually use. Forget generic checklists – this is a roadmap built for your home, whether you're working with a tight budget or have a garage full of tools.
Prioritizing Your Windows for Maximum Impact
First, find the windows that are causing the most trouble. Feel around for drafts, look for any obvious gaps, and think about which rooms you spend the most time in. Honestly, sealing the windows in high-traffic areas first makes the biggest difference in comfort and savings. A drafty window in your living room is going to bother you way more than one in a guest room you rarely use.
Setting Realistic Timelines and Goals
Let's be real – how much time do you actually have? Sealing a couple of windows might be a quick afternoon project. Sealing the whole house? That's probably a weekend project (or maybe two). Break it down into smaller chunks. Maybe tackle one room each weekend. It makes the whole thing less overwhelming and you get to celebrate those small wins along the way.
Maintaining Your Seals for Long-Term Performance
Once your windows are sealed, you’re not quite done. Check your seals every year for wear and tear. Look for cracks, peeling, or gaps. Replacing damaged sections right away will make your seals last longer and keep those drafts out. Think of it like an oil change for your car—a little maintenance goes a long way.
Recognizing When It’s Time for New Windows
Sometimes, sealing just isn’t enough. If your windows are old, warped, or the seals between the panes are shot, it might be time for new ones. New windows are a huge upgrade for energy efficiency and can seriously cut down on drafts and condensation.
Ready to make your home a warm and cozy escape this winter? Check out Gladiator Window and Doors' wide selection of high-quality, energy-efficient windows and doors at great prices.


