


Upgrade Your Home with Inspiring Window Transformations
See the dramatic impact of window replacement with these before and after examples. This listicle reveals six key considerations for your project. Learn how to document the transformation, from capturing compelling before and after photos to measuring energy efficiency gains and noise reduction. We'll explore professional vs. DIY installation, choosing the right window style and material, and preparing for potential construction challenges. Discover the power of strategic window replacement and elevate your home's comfort and value.
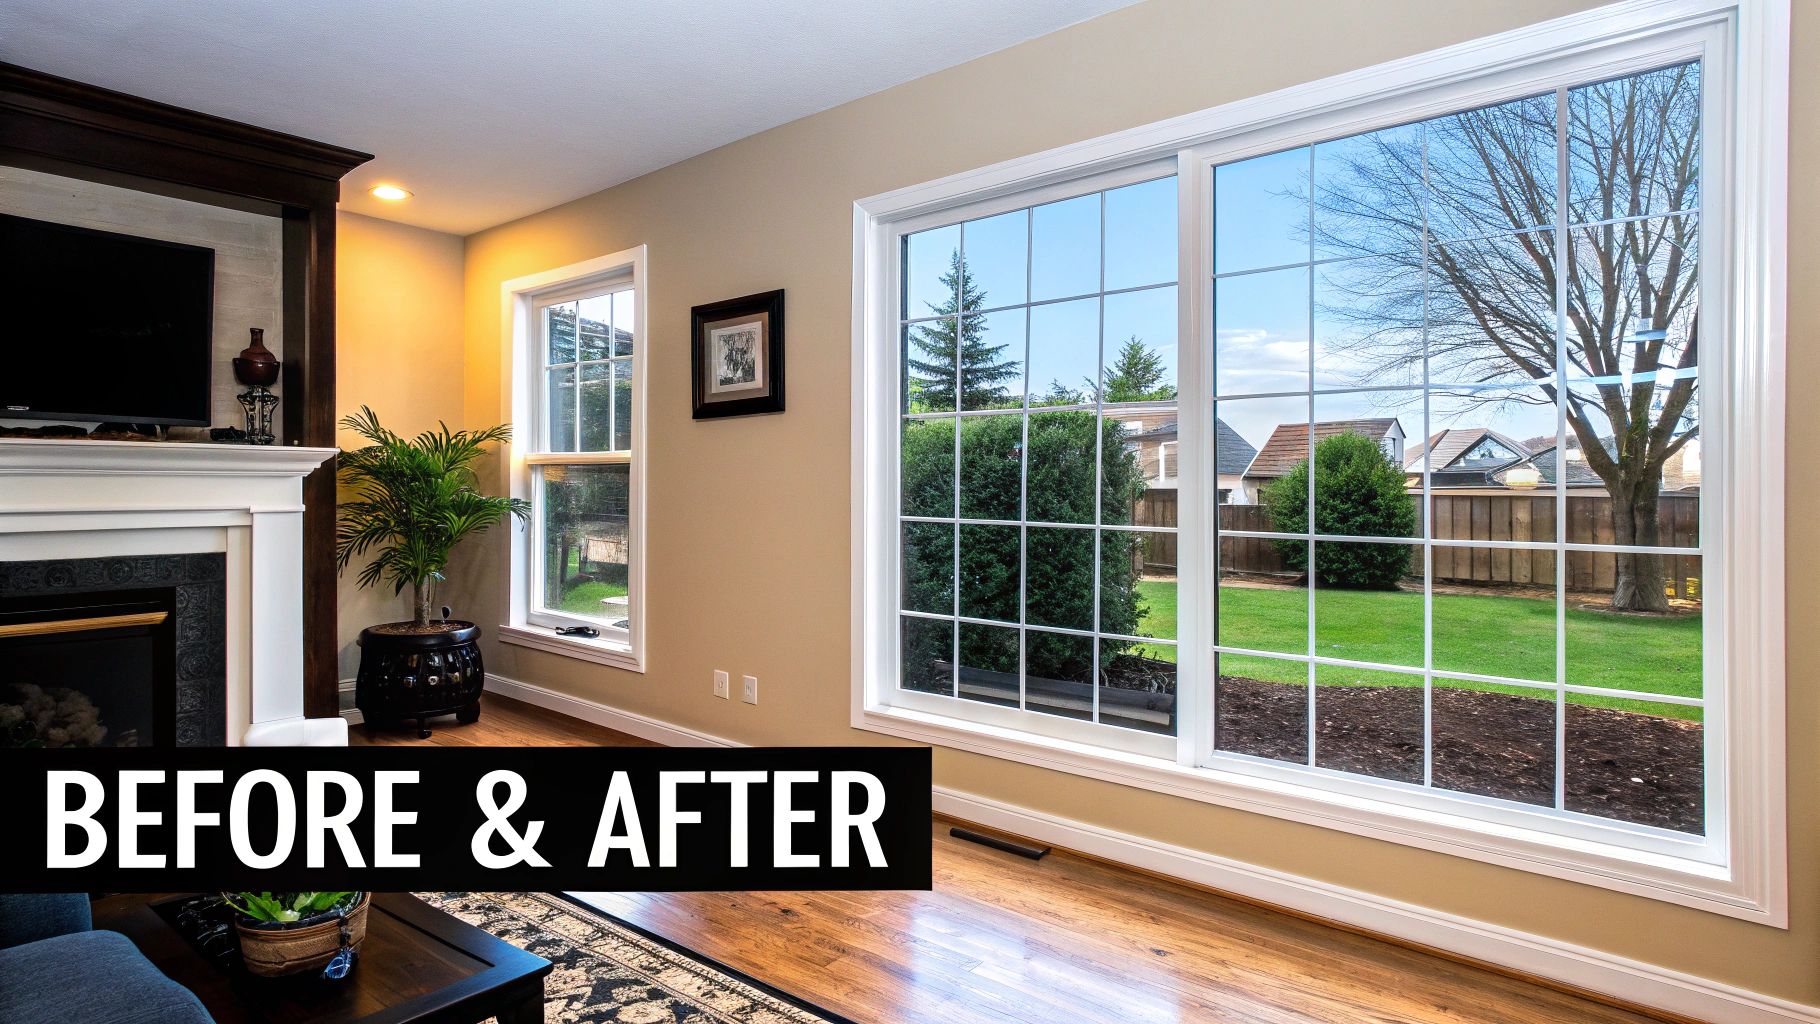
1. Take Detailed Before and After Photos
Documenting your window replacement project with high-quality before and after photos is a crucial first step. This allows you to track the transformation from start to finish, provides valuable visual evidence of your investment's impact, and serves as helpful documentation for insurance and future home improvements. Capturing the full scope of the project, from drab, outdated windows to sleek, energy-efficient replacements, creates a compelling narrative of the upgrade.
Before embarking on your project, consider how you want the final outcome to look. Tools like Pedra can even help you visualize potential renovations beforehand. You can explore different styles and configurations with renovate interiors with AI to get a clearer picture of your desired result. This visualization exercise can also inform your before photos, ensuring you capture all the necessary angles and details.
This meticulous documentation offers numerous benefits. It provides evidence for insurance or warranty claims, helps you visualize and fully appreciate the impact of the changes, and is useful for documenting improvements when determining resale value. For example, a homeowner in Michigan meticulously documented their single-pane to triple-pane window replacement, providing compelling visual evidence of the project that resulted in a verifiable 30% energy savings. Similarly, a California renovation blog showcased the dramatic aesthetic improvement achieved by switching from aluminum to wooden frame windows, using before and after photos to highlight the transformation.
While taking detailed photos is highly beneficial, it does require planning and consistent photography techniques. For the best results, you might need professional equipment, and capturing all windows properly can be time-consuming. However, the payoff in terms of documentation and the ability to showcase the window replacement before and after transformation is well worth the effort.
Tips for Taking Effective Before & After Photos:
- Consistency is Key: Use the same time of day and lighting conditions for both before and after shots to ensure accurate comparisons.
- Capture the Whole Picture: Take wide shots of rooms to showcase the overall impact and close-ups of details like frames and hardware to highlight specific improvements.
- Show Functionality: Include shots that demonstrate the window operation (open/closed) to document improvements in functionality.
- Stability Matters: Use a tripod for consistent angles and to avoid blurry images.
- Consider Seasonal Changes: If possible, include seasonal photos to show the window's performance in different weather conditions.
2. Measure Energy Efficiency Improvements
One of the most compelling reasons to invest in window replacement is the potential for significant energy savings. Measuring and documenting these improvements before and after installation transforms this potential into concrete data, showcasing the true return on investment (ROI) of your window replacement project. This process not only validates the expense but can also help you qualify for valuable tax credits and rebates. By meticulously tracking energy metrics, you'll witness the long-term value of your upgraded windows unfold in the form of lower utility bills and enhanced home comfort.
This method involves comparing key energy performance indicators before and after your new windows are installed. This includes tracking changes in your actual utility bills, as well as comparing metrics such as the U-factor (measuring heat transfer) and Solar Heat Gain Coefficient (SHGC) (measuring solar heat gain) of your old and new windows. Understanding the difference in ENERGY STAR ratings between the old and new windows also provides valuable insight into the anticipated energy performance improvements.
For example, a family in the Midwest documented a 22% reduction in their heating costs after switching to Low-E double-pane windows. Similarly, a Florida homeowner measured a remarkable 15°F temperature difference near their windows after installation, highlighting the impact on indoor comfort. These real-world examples underscore the potential benefits of window replacement for homeowners in diverse climates.
Actionable Tips for Measuring Energy Efficiency:
- Gather Utility Bills: Keep copies of your utility bills from the 12 months preceding and following the window replacement. This provides a clear comparison of energy consumption.
- Thermal Imaging: Consider using a thermal camera to visually document temperature differences near your windows before and after installation. This can dramatically illustrate the improved insulation provided by the new windows.
- Blower Door Test: A blower door test conducted both before and after replacement will quantify air leakage improvements, a key factor in energy efficiency.
- Smart Thermostat Data: Track indoor temperature stability and HVAC system runtime using smart thermostats. Reduced runtime directly translates into energy savings.
- Document Everything: Maintain detailed records of all measurements and observations. This documentation will be invaluable when applying for rebates or tax credits.
When and Why to Use This Approach:
Measuring energy efficiency improvements is particularly useful if you're aiming to maximize your ROI and potentially qualify for financial incentives. It’s also a powerful way to demonstrate the tangible benefits of your investment, whether you’re a homeowner looking to improve comfort and reduce expenses, or a contractor seeking to showcase the value of your services to potential clients. While factors beyond windows can influence energy bills, a careful analysis can still reveal significant improvements attributable to the window upgrade.
Pros:
- Provides concrete ROI metrics
- Helps qualify for tax credits and rebates
- Demonstrates long-term value of the investment
Cons:
- Requires several months of data for accurate comparison
- Seasonal variations can complicate analysis
- Many factors beyond windows affect energy bills
Learn more about Measure Energy Efficiency Improvements
This detailed analysis of energy efficiency improvements rightly earns its place on this list because it provides a quantifiable measure of the benefits of window replacement, going beyond anecdotal evidence. It empowers homeowners, contractors, and builders alike to make informed decisions and demonstrate the true value of this important home improvement. This information is particularly valuable for our target audience of homeowners, condo owners, contractors, builders, developers, general contractors, homeowners aged 25-65+, commercial property owners, new homeowners, and those undertaking renovations, remodels, or new construction projects. The ability to showcase concrete energy savings can significantly influence purchasing decisions and justify the investment in window replacement before and after comparisons. Programs like ENERGY STAR, the Department of Energy Home Energy Audits, and tools like Marvin Windows energy efficiency calculators have further popularized this approach, emphasizing its importance in the industry.
3. Consider Professional vs. DIY Installation
A critical aspect of any window replacement before and after transformation is the decision of who will handle the installation: a professional contractor or yourself. This choice significantly impacts the project's success, affecting not just the initial window replacement before and after appearance, but also long-term performance, cost, and warranty coverage. Understanding the implications of professional versus DIY installation is paramount for achieving the desired results in your window replacement project.
Professional Installation:
Opting for professional installation often means a higher upfront cost, typically adding 10-25% to the total project expense. However, this investment comes with benefits. Experienced installers possess the expertise to ensure proper sealing and insulation, maximizing energy efficiency and minimizing drafts. They also have the necessary tools and knowledge to handle complex installations, including custom-sized windows or challenging architectural details. Perhaps most importantly, professional installation often comes with robust warranty protection, covering both the windows themselves and the labor. This provides peace of mind knowing that any issues arising from faulty installation will be addressed.
DIY Installation:
The primary draw of DIY installation is cost savings. By handling the labor yourself, you can eliminate the expense of professional installers. This can be a substantial saving, as exemplified by a Massachusetts homeowner who saved $3,200 by installing eight windows themselves. DIY also offers flexible scheduling, allowing you to work at your own pace. However, this approach is time-intensive and requires specialized tools and a certain level of skill. Improper installation can lead to air leaks, reduced energy efficiency, and even void the manufacturer's warranty. Furthermore, as Anderson Windows reports, professionally installed windows result in 40% fewer service calls, highlighting the potential for long-term complications with DIY projects.
Weighing the Pros and Cons:
| Feature | Professional Installation | DIY Installation |
|---|---|---|
| Cost | Higher (includes labor) | Lower (no labor cost) |
| Warranty | Typically comprehensive | Potentially voided by improper installation |
| Installation Quality | Generally higher | Dependent on individual skill |
| Time Investment | Lower | Higher |
| Skill Required | Specialized expertise | Basic carpentry skills and willingness to learn |
Tips for Making the Right Decision:
- Get Multiple Quotes: Obtain at least three quotes from reputable window installation companies to compare pricing and services.
- Check Warranty Requirements: Carefully review the manufacturer's warranty to understand the implications of DIY installation on coverage.
- Start Small (DIY): If choosing the DIY route, begin with less visible windows to practice and refine your skills before tackling prominent areas.
- Consider a Hybrid Approach: Engage professionals for complex window installations and handle standard, straightforward replacements yourself.
- Document Everything (DIY): Photograph each step of the DIY installation process for future reference and potential warranty claims.
When to Choose Which Approach:
- Professional Installation: Choose this option for complex installations, custom windows, limited time availability, and maximum warranty protection. This is especially crucial for window replacement before and after projects aimed at significantly improving energy efficiency.
- DIY Installation: Consider this route if you're comfortable with basic carpentry, have ample time, and prioritize cost savings above all else.
Learn more about Consider Professional vs. DIY Installation
This aspect of window replacement deserves careful consideration as it directly impacts the final window replacement before and after results. Choosing the right installation method, whether professional or DIY, is essential for achieving a successful and satisfying outcome. Pella's certified installation program, Home Depot installation services, and This Old House DIY window installation episodes are excellent resources for further research. This information is relevant for a wide audience, including homeowners, condo owners, contractors, builders, developers, general contractors, commercial property owners, new homeowners, and anyone undertaking renovations or new construction.
4. Document Noise Reduction Benefits
One of the most impactful yet often overlooked benefits of window replacement is the significant reduction in noise pollution. Documenting this improvement before and after new window installation provides compelling evidence of this valuable upgrade, strengthening its appeal for potential buyers and enhancing your own enjoyment of a quieter home. This is particularly relevant for properties in urban environments, near busy roads, airports, or other significant noise sources. By showcasing the tangible difference new windows make, you transform noise reduction from an abstract concept to a quantifiable improvement in your quality of life.
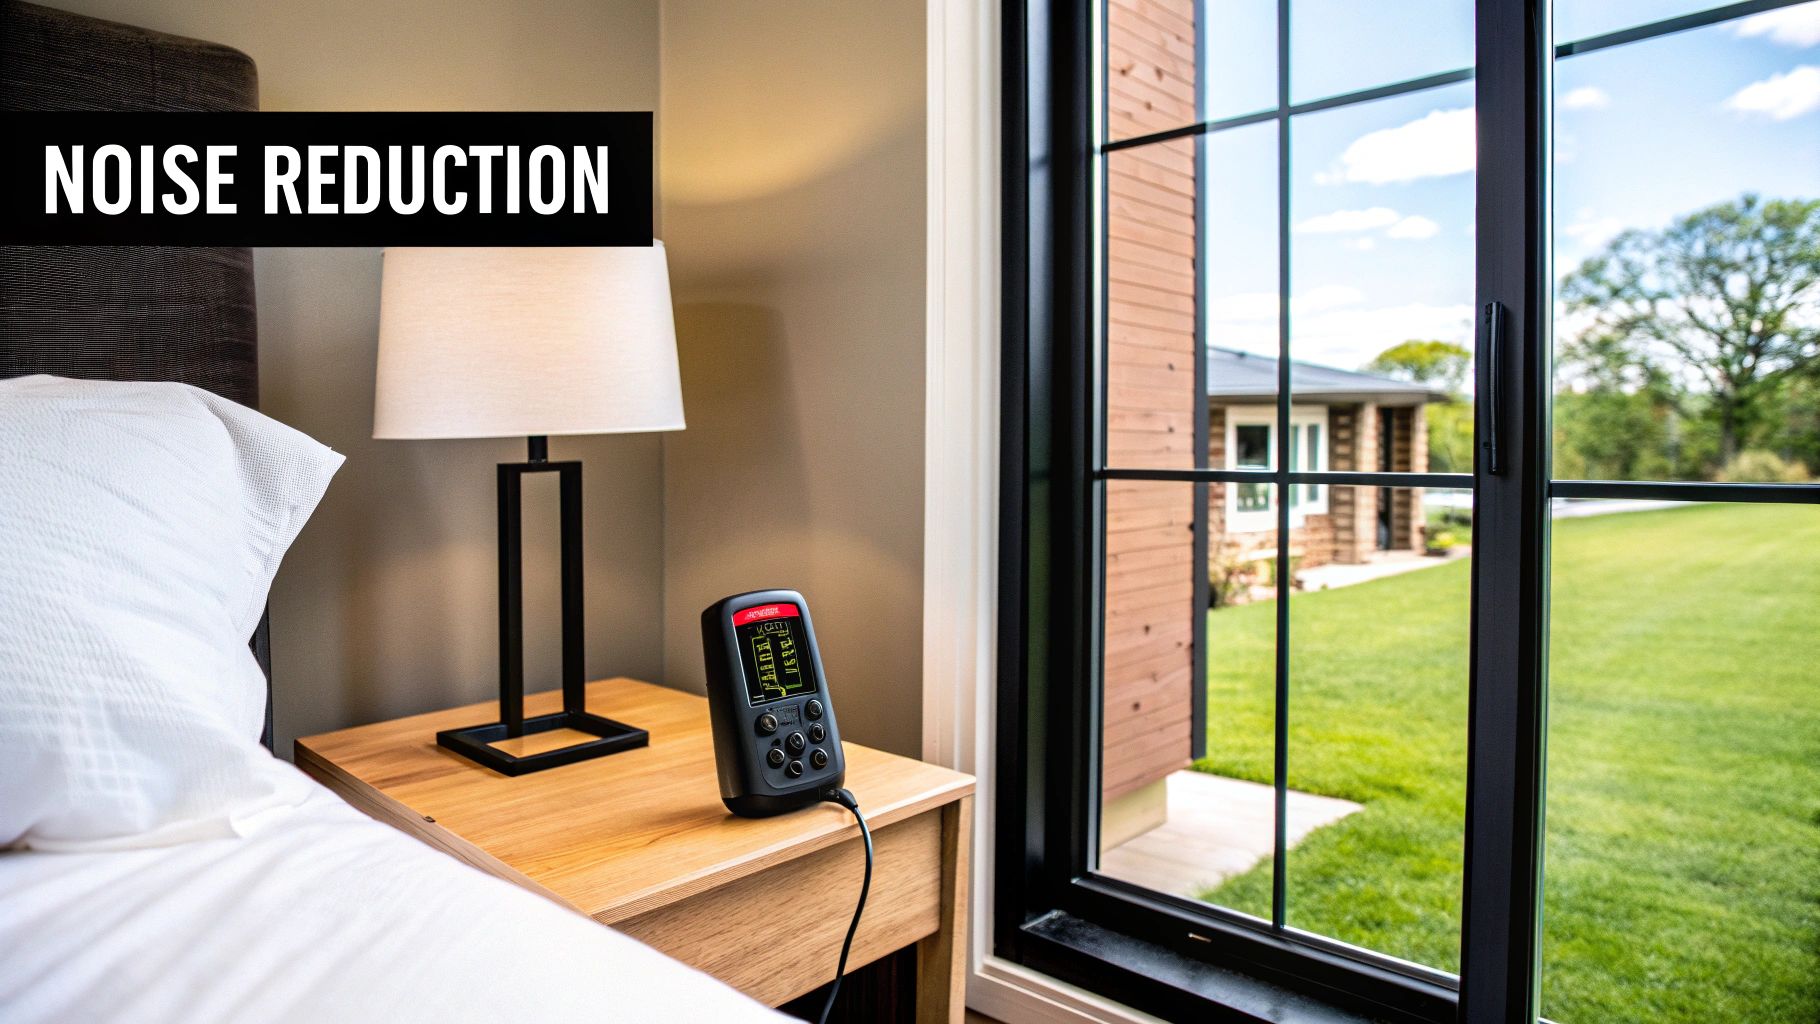
Modern replacement windows achieve noise reduction through several key features, including double or triple-pane glass with varying thicknesses and specialized acoustic laminated glass options. The window frame material also plays a significant role in sound transmission. Upgrading to windows with a higher Sound Transmission Class (STC) rating is a crucial factor in achieving noticeable noise reduction. For instance, a Chicago apartment dweller documented a remarkable 68% noise reduction after installing laminated glass windows, demonstrating the potential for dramatic improvement. Similarly, a homeowner near the Seattle airport measured a 7 dB reduction in airplane noise after window replacement, showcasing the effectiveness of modern window technology. Learn more about Document Noise Reduction Benefits
This approach to evaluating window replacement before and after scenarios is particularly valuable because it allows for objective measurement of a key benefit. It shifts the focus from aesthetics to a quantifiable improvement in comfort and well-being. The demonstrable noise reduction translates to increased property value, particularly in noise-affected locations. Beyond the financial benefits, experiencing a quieter home leads to improved sleep, reduced stress, and enhanced concentration, especially beneficial for those working from home.
While the advantages are significant, it’s important to consider the potential drawbacks. Premium soundproofing features typically add to the overall project cost. Furthermore, while modern windows can drastically reduce noise, complete elimination of all external sound is unrealistic. Different noise frequencies also necessitate different solutions, meaning a tailored approach is often required for optimal results.
To document noise reduction effectively, use a decibel meter app to measure and record before and after noise levels at various times of day. Recording audio samples can provide further qualitative evidence of the improvement. Consider varying STC ratings for different rooms, prioritizing higher ratings for bedrooms and other noise-sensitive spaces. Test with various noise types, such as traffic, voices, and aircraft, to gain a comprehensive understanding of the window's performance. Finally, document both objective measurements and subjective impressions to provide a complete picture of the window replacement’s impact on noise reduction.
This method deserves its place in the list because it showcases a critical aspect of window replacement that often goes unquantified. By highlighting the measurable benefits of noise reduction, you not only justify the investment but also contribute to a more peaceful and comfortable living environment. Products like Milgard Quiet Line™ windows, Andersen's Sound Control Solutions, and Soundproof Windows, Inc. secondary glazing systems demonstrate the increasing market demand for noise reduction solutions in window replacement projects. Whether you are a homeowner, contractor, or developer, documenting noise reduction benefits adds tangible value to any window replacement project.
5. Choose the Right Window Style and Material
Selecting the right window style and material is a crucial step in any window replacement project. This decision significantly impacts your home's appearance, functionality, energy efficiency, and overall value. Examining window replacement before and after photos showcasing different styles and materials can be incredibly helpful in visualizing the transformation and making informed choices. This careful selection not only enhances aesthetics but also influences ventilation, maintenance needs, and even your home's resale value. Understanding the various options available empowers you to make the best choice for your specific needs and budget.

From frame materials like vinyl, wood, fiberglass, aluminum, and composite to various window styles such as double-hung, casement, sliding, awning, and picture windows, the possibilities are extensive. Furthermore, glass options like double or triple panes, Low-E coatings, and gas fills contribute to energy efficiency and comfort. Even seemingly minor details like grid patterns and hardware finishes play a role in the final aesthetic. Learn more about Choose the Right Window Style and Material This allows for a truly customized approach, ensuring your new windows perfectly complement your home's architectural style and your personal preferences.
Examples of Successful Implementation:
- A Victorian home in Portland saw a $45,000 value increase after restoring its period-appropriate wood windows with modern weather-stripping. This demonstrates how respecting architectural integrity while incorporating modern technology can significantly enhance a property's worth.
- A beachfront property in Miami reduced insurance premiums by 15% by replacing aluminum windows with impact-resistant vinyl. This highlights the practical benefits of choosing materials suited to specific environmental conditions.
Pros:
- Enhanced Functionality and Style: Upgrade functionality (like ease of operation and ventilation) while maintaining or even enhancing your home's architectural style.
- Reduced Maintenance: Opting for materials like vinyl or fiberglass can significantly reduce maintenance requirements compared to wood.
- Improved Ventilation and Light: Different window styles offer varying degrees of ventilation and natural light penetration, allowing you to optimize your home's environment.
- Increased Durability and Lifespan: Upgrading to more durable materials can extend the lifespan of your windows and protect your investment.
Cons:
- Historic Home Restrictions: Historic homes may have restrictions on window modifications, limiting your choices.
- Cost of Premium Materials: Premium materials like fiberglass and high-performance glass options can significantly increase project costs.
- Limited Availability: Some combinations of style and material may have limited availability, requiring longer lead times.
Actionable Tips:
- Create a Mood Board: Visualize your desired aesthetic by creating a mood board with potential window styles and finishes.
- Test One Window: Install one window as a test to evaluate its performance and aesthetics before committing to the entire house.
- Consider Climate Requirements: Factor in your local climate when selecting glass options. SHGC (Solar Heat Gain Coefficient) is crucial for hot climates, while U-factor is important for cold climates.
- Match Architectural Style: Matching window style to your home's architectural period maximizes curb appeal and resale value.
- Document Existing Windows: Thoroughly document each window's condition, size, and style before ordering replacements to ensure accurate measurements and a smooth installation process.
This stage of window replacement deserves its place on the list because it's the cornerstone of a successful project. It bridges the gap between your vision for your home and the practical realities of construction. Choosing the right window style and material is an investment that pays off in terms of aesthetics, functionality, energy efficiency, and overall home value. Popularized by brands like Marvin, Pella, and Renewal by Andersen, the focus on customization and high-quality materials allows homeowners to achieve truly transformative window replacement before and after results.
6. Prepare for Construction Challenges
Window replacement before and after pictures often showcase stunning transformations, but the journey between those two points isn't always smooth. Anticipating potential construction challenges is crucial for a successful window replacement project. While new windows offer improved energy efficiency, aesthetics, and functionality, the installation process can unearth hidden problems that impact your budget and timeline. These problems can range from minor inconveniences to significant structural issues, making preemptive planning essential. Learn more about Prepare for Construction Challenges
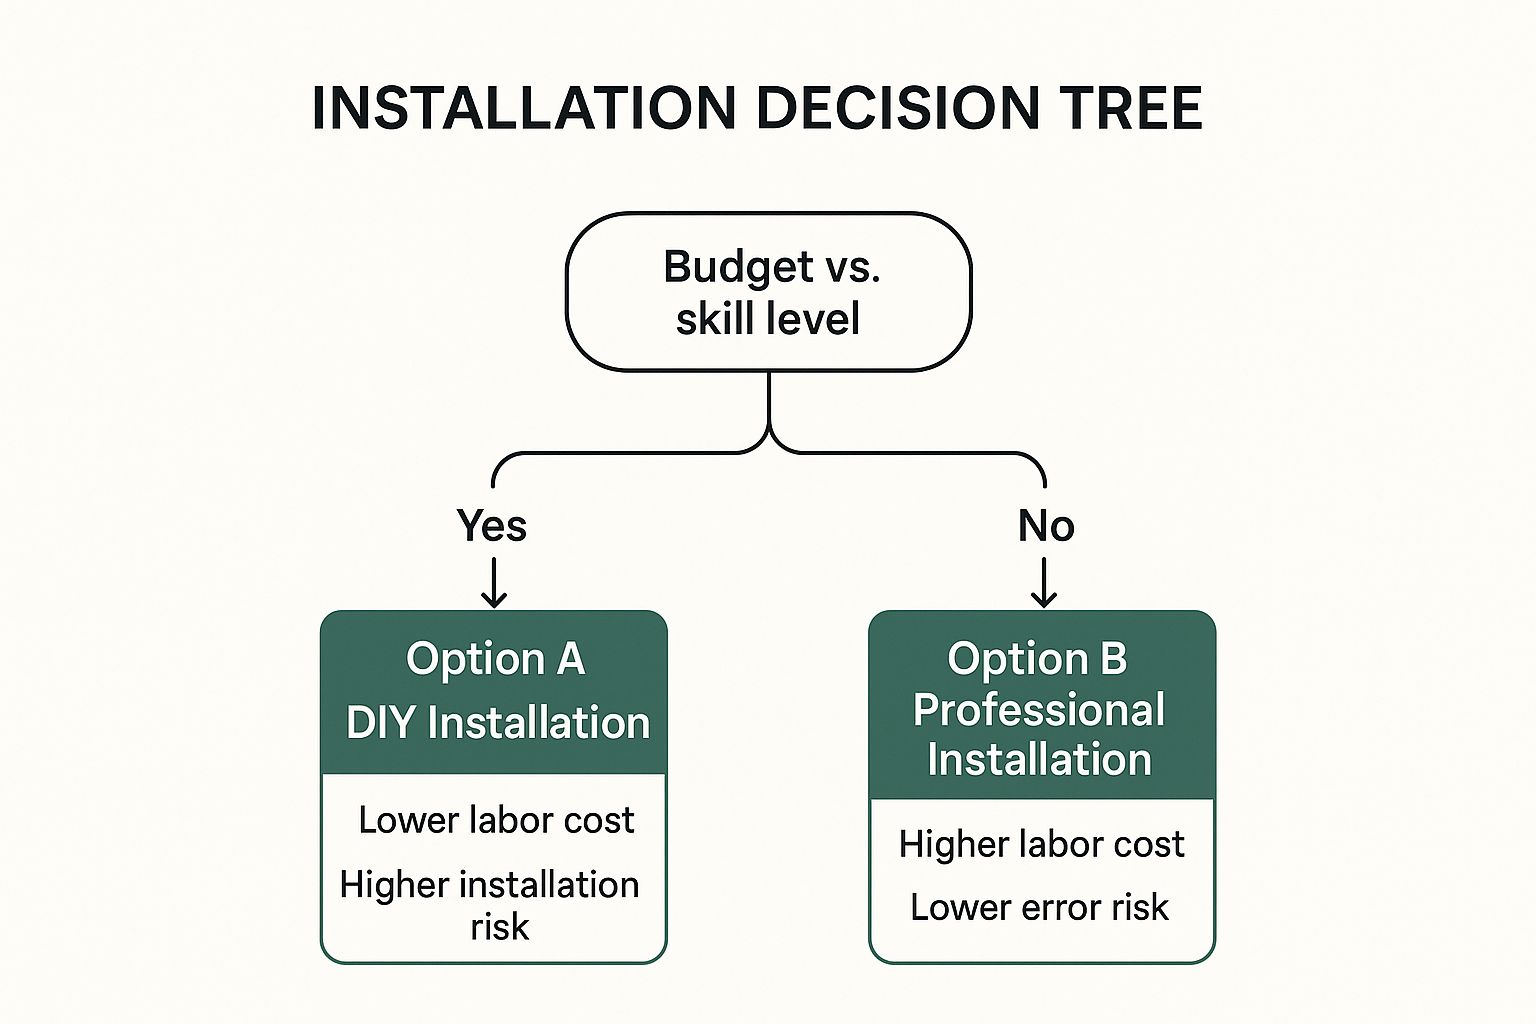
This decision tree infographic provides a simplified process for navigating common window replacement challenges. Starting with the discovery of an issue, the chart guides you through assessment, consultation (if necessary), remediation, and documentation. It emphasizes the importance of professional advice when dealing with structural or complex issues.
Features of potential problems include the discovery of hidden water damage or rot, non-standard rough openings, unexpected structural support requirements, and unanticipated insulation and air-sealing needs. For example, a New England homeowner discovered extensive termite damage during a window replacement, requiring $7,500 in additional repairs. Similarly, an Arizona renovation uncovered improper previous installation that had caused hidden water damage to stucco walls. These real-world examples underscore the importance of preparation.
Addressing these underlying issues during your window replacement improves the long-term performance of your windows and your home's overall structural integrity. Proper documentation, including photos and measurements, is crucial for insurance claims and prevents similar problems in future projects. Proactively addressing these potential issues leads to better project outcomes and more accurate budgeting from the start.
Pros:
- Addressing underlying issues improves long-term performance.
- Documentation helps with insurance claims.
- Proper remediation prevents future problems.
- Opportunity to improve structural integrity.
Cons:
- Unexpected discoveries can increase costs substantially.
- May extend project timeline significantly.
- Could require additional contractors (structural engineer, electrician).
- Might necessitate permit modifications.
Tips for Navigating Potential Challenges:
- Budget Contingency: Include a 10-15% contingency in your budget for unexpected issues.
- Preliminary Inspection: Remove trim before contractors arrive to facilitate a thorough inspection for potential problems.
- Document Everything: Photograph and measure all discovered issues.
- Formalize Changes: Get written change orders for any additional work required.
- Weather Protection: Have temporary weather protection materials on hand in case of unexpected delays or extensive repairs.
- Decision Tree: Create a decision tree for potential issues with your contractor beforehand, outlining responsibilities and processes. This proactive approach ensures everyone is on the same page should problems arise.
This preparation deserves a place on this list because while the “after” picture is the goal, understanding and mitigating potential problems during the process ensures a truly successful window replacement before and after transformation, preventing future headaches and preserving your investment. This is critical information for homeowners, condo owners, contractors, builders, developers, and anyone involved in new construction or renovation projects. By understanding these potential challenges, you can ensure your window replacement project delivers the beautiful and functional results you envision.
6 Tips Comparison Before & After Window Replacement
| Tip Title | Implementation Complexity 🔄 | Resource Requirements ⚡ | Expected Outcomes 📊 | Ideal Use Cases 💡 | Key Advantages ⭐ |
|---|---|---|---|---|---|
| Take Detailed Before and After Photos | Medium - requires planning and consistent technique | Moderate - possible need for professional equipment | Visual documentation, insurance support, resale value evidence | Tracking project progress, documenting transformations | Provides clear visual proof, useful for future projects |
| Measure Energy Efficiency Improvements | High - requires data collection over months | High - needs tools like thermal cameras, utility data | Concrete ROI metrics, tax credit eligibility, energy savings | Quantifying financial and comfort benefits of window replacement | Demonstrates measurable savings and efficiency gains |
| Consider Professional vs. DIY Installation | Variable - depends on chosen approach | Variable - professional labor cost vs. DIY tools/time | Quality of installation, warranty validity, cost-saving | Choosing between cost-saving DIY or guaranteed professional quality | Professional ensures quality and warranty; DIY reduces cost |
| Document Noise Reduction Benefits | Medium - requires sound measurement tools | Moderate - decibel meters, optional specialized windows | Improved comfort, noise reduction quantified | Homes in noisy environments seeking soundproofing benefits | Tangible evidence of noise reduction, enhances comfort |
| Choose the Right Window Style and Material | Medium to High - requires research and selection | Moderate to High - depends on material and style costs | Improved aesthetics, functionality, maintenance | Home style upgrades, historic restorations, climate considerations | Enhances home value and performance, customized options |
| Prepare for Construction Challenges | High - requires inspection and problem-solving | High - potential additional contractors and materials | Avoids hidden damage issues, improves structural integrity | Projects with older homes or suspected hidden damage | Minimizes risks and additional costs through preparation |
Reap the Rewards of Window Replacement
As you've seen from the various window replacement before and after scenarios discussed, upgrading your windows is a significant investment that yields substantial returns. From boosting energy efficiency and reducing noise pollution to enhancing curb appeal and increasing property value, the benefits are multifaceted. Whether you're tackling a DIY project or opting for professional installation, meticulous planning and documentation are crucial for maximizing your results. Remembering key steps like capturing detailed before and after photos, measuring energy efficiency improvements, and carefully selecting the right window style and material will ensure a successful and satisfying outcome. Understanding the potential construction challenges beforehand allows you to navigate the process smoothly and appreciate the final transformation even more. By mastering these concepts, you're not just improving your home; you're investing in long-term comfort, cost savings, and increased property value.
The striking difference between window replacement before and after photos truly showcases the transformative power of new windows. Ready to experience this transformation in your own home? Gladiator Window and Doors offers custom-made, thermally rated, USA-approved windows at the lowest prices in the USA, backed by our Best Offer Guarantee. Visit Gladiator Window and Doors today to explore our selection and receive a free quote for your window replacement project.


