


Essential Tools And Materials You Actually Need

Successfully installing an exterior door depends heavily on having the right tools and materials. This doesn't mean breaking the bank on the fanciest gadgets. Instead, it's about assembling a practical and efficient toolkit. This section will guide you through that process, highlighting the essentials and suggesting cost-effective alternatives where specialized equipment might seem necessary.
Must-Have Tools
A level, for instance, isn't just a suggestion; it's absolutely vital for a properly functioning door. Ignoring this crucial tool can result in an uneven installation, leading to sticking, drafts, and potential security risks.
Here are the tools you absolutely need:
- Safety Glasses and Gloves: Protecting yourself should always be the top priority. Eye and hand injuries are unfortunately common during door installations.
- Measuring Tape: Accurate measurements are the foundation of any successful installation. Think of it like a recipe – the right measurements are crucial.
- Level: This ensures the door frame is plumb and level, which is essential for smooth operation. A misaligned door simply won't work well.
- Hammer: This classic tool is necessary for driving nails and gently tapping shims into place. We'll discuss shims in more detail later.
- Drill: A drill is needed for creating pilot holes and driving screws. Screws generally provide a much more secure hold than nails alone.
- Screwdriver Set: This is important for handling the different screw types you'll encounter during the installation process.
- Reciprocating Saw (Optional): While a handsaw can do the job, a reciprocating saw offers a quicker way to trim any excess material.
- Utility Knife: Essential for clean cuts through various materials, such as weatherstripping and caulk.
Having these tools readily available will make the entire process more efficient and significantly less frustrating.
Essential Materials
Just as important as the right tools are the right materials. This includes the exterior door itself and all its supporting components.
- Exterior Door: Choose a door from a reputable manufacturer known for quality and durability. Investing in a well-made door ensures long-lasting performance.
- Door Frame: Ensure the frame is the correct size for your opening and complements the door material. A solid frame is essential for a secure and stable door.
- Shims: These small wedges play a big role in leveling and plumbing the door frame within the rough opening.
- Screws: Use exterior-grade screws for a weather-resistant, rust-proof hold.
- Caulk and Weatherstripping: Crucial for sealing gaps and preventing energy-wasting drafts. Proper weatherproofing protects your home and saves you money.
- Expanding Foam Insulation (Optional): This adds an extra layer of insulation and further seals against drafts.
Having all the necessary materials on hand ensures a smoother installation process, avoiding mid-project trips to the hardware store.
Before we get to the actual installation, let's talk about preparing your workspace.
Preparing Your Workspace
A clean and organized workspace is surprisingly important. A clutter-free environment allows you to find what you need quickly and work safely.
- Clear the Area: Remove any furniture, debris, or anything that could obstruct your work or create tripping hazards.
- Protect Flooring: Cover the floor with drop cloths to prevent damage from falling tools or materials.
- Organize Materials: Keep your tools and materials readily accessible but organized for a safe working environment.
This preparation may seem minor, but it can significantly impact your efficiency and the overall success of the project. It's like having a well-organized kitchen – everything is at your fingertips when you need it.
Now, to help you gather everything you'll need, let's take a look at the following checklist.
Complete Tool and Material Checklist
Comprehensive list of required tools, materials, and estimated costs for exterior door installation
| Item | Purpose | Essential/Optional | Estimated Cost |
|---|---|---|---|
| Safety Glasses & Gloves | Eye and hand protection | Essential | $10 - $20 |
| Measuring Tape | Accurate measurements of door and frame | Essential | $5 - $15 |
| Level | Ensuring plumb and level installation | Essential | $15 - $30 |
| Hammer | Driving nails and tapping shims | Essential | $10 - $20 |
| Drill | Creating pilot holes and driving screws | Essential | $50 - $100 |
| Screwdriver Set | Driving various screw types | Essential | $15 - $30 |
| Reciprocating Saw | Trimming excess material | Optional | $75 - $150 |
| Utility Knife | Cutting weatherstripping and caulk | Essential | $5 - $10 |
| Exterior Door | The door itself | Essential | $200 - $1000 |
| Door Frame | Supporting structure for the door | Essential | $100 - $300 |
| Shims | Leveling and plumbing the door frame | Essential | $5 - $10 |
| Exterior Grade Screws | Weather-resistant fastening | Essential | $10 - $20 |
| Caulk and Weatherstripping | Sealing gaps and preventing drafts | Essential | $15 - $30 |
| Expanding Foam Insulation | Additional insulation and draft sealing (optional) | Optional | $10 - $20 |
This table provides a comprehensive overview of the necessary tools and materials, along with their estimated costs. Gathering these items beforehand streamlines the installation process and helps you budget effectively. Now, with your workspace prepared and your materials gathered, you're ready to begin the installation process.
Choosing The Perfect Door For Your Home
Picking the right exterior door is a big decision. It's not just about looks; it's about finding the perfect balance of security, energy efficiency, and value. This choice impacts your home's curb appeal, comfort, and safety. Let's explore the essential factors to consider when selecting the ideal door. For a deeper dive, check out this helpful guide: How to master choosing an exterior door.
Understanding Door Materials
The material of your exterior door plays a crucial role in its performance and lifespan. Each material comes with its own set of advantages and disadvantages.
For instance, wood doors offer a timeless aesthetic and excellent insulation. However, they require consistent upkeep. Steel doors are known for their security and affordability. But, they can be prone to dents and rust.
- Wood: Beautiful and insulating, but susceptible to warping and rot in damp conditions.
- Steel: Secure and budget-friendly, but can dent and rust.
- Fiberglass: Durable and low-maintenance, and can even resemble wood. It is, however, typically more expensive.
- Composite: Engineered for strength and energy efficiency, using a combination of materials like wood fiber and resin.
Decoding Energy Efficiency
Energy-efficient doors can lower your energy bills and create a more comfortable home. Look for doors with a low U-factor. This measurement indicates good insulation, meaning less heat transfer and a more stable indoor temperature. The Energy Star label is another helpful indicator, certifying that the door meets specific energy efficiency guidelines.
Prioritizing Security Features
Your exterior door is your home's primary defense against intruders. A solid core door offers superior security compared to a hollow-core door. Features like reinforced frames and multi-point locking systems further enhance protection. Multi-point locks secure the door at multiple points along the frame, making it much harder to force open.
Considering Climate and Budget
Your local climate should influence your door material selection. In humid areas, fiberglass or composite doors resist moisture better than wood. Your budget is another important factor. Wood and composite doors are generally pricier than steel.
There's a growing global trend towards smart and eco-friendly exterior doors. Doors with high-end designs, attractive aesthetics, and smart features like remote monitoring and enhanced security are increasingly in demand. This shift is driven by growing environmental awareness, leading to a greater preference for sustainable materials. You can explore detailed market statistics here.
By carefully balancing these practical considerations with your personal style, you can confidently choose the perfect door for your home. Then, you'll be ready for the next step: prepping your door opening for installation.
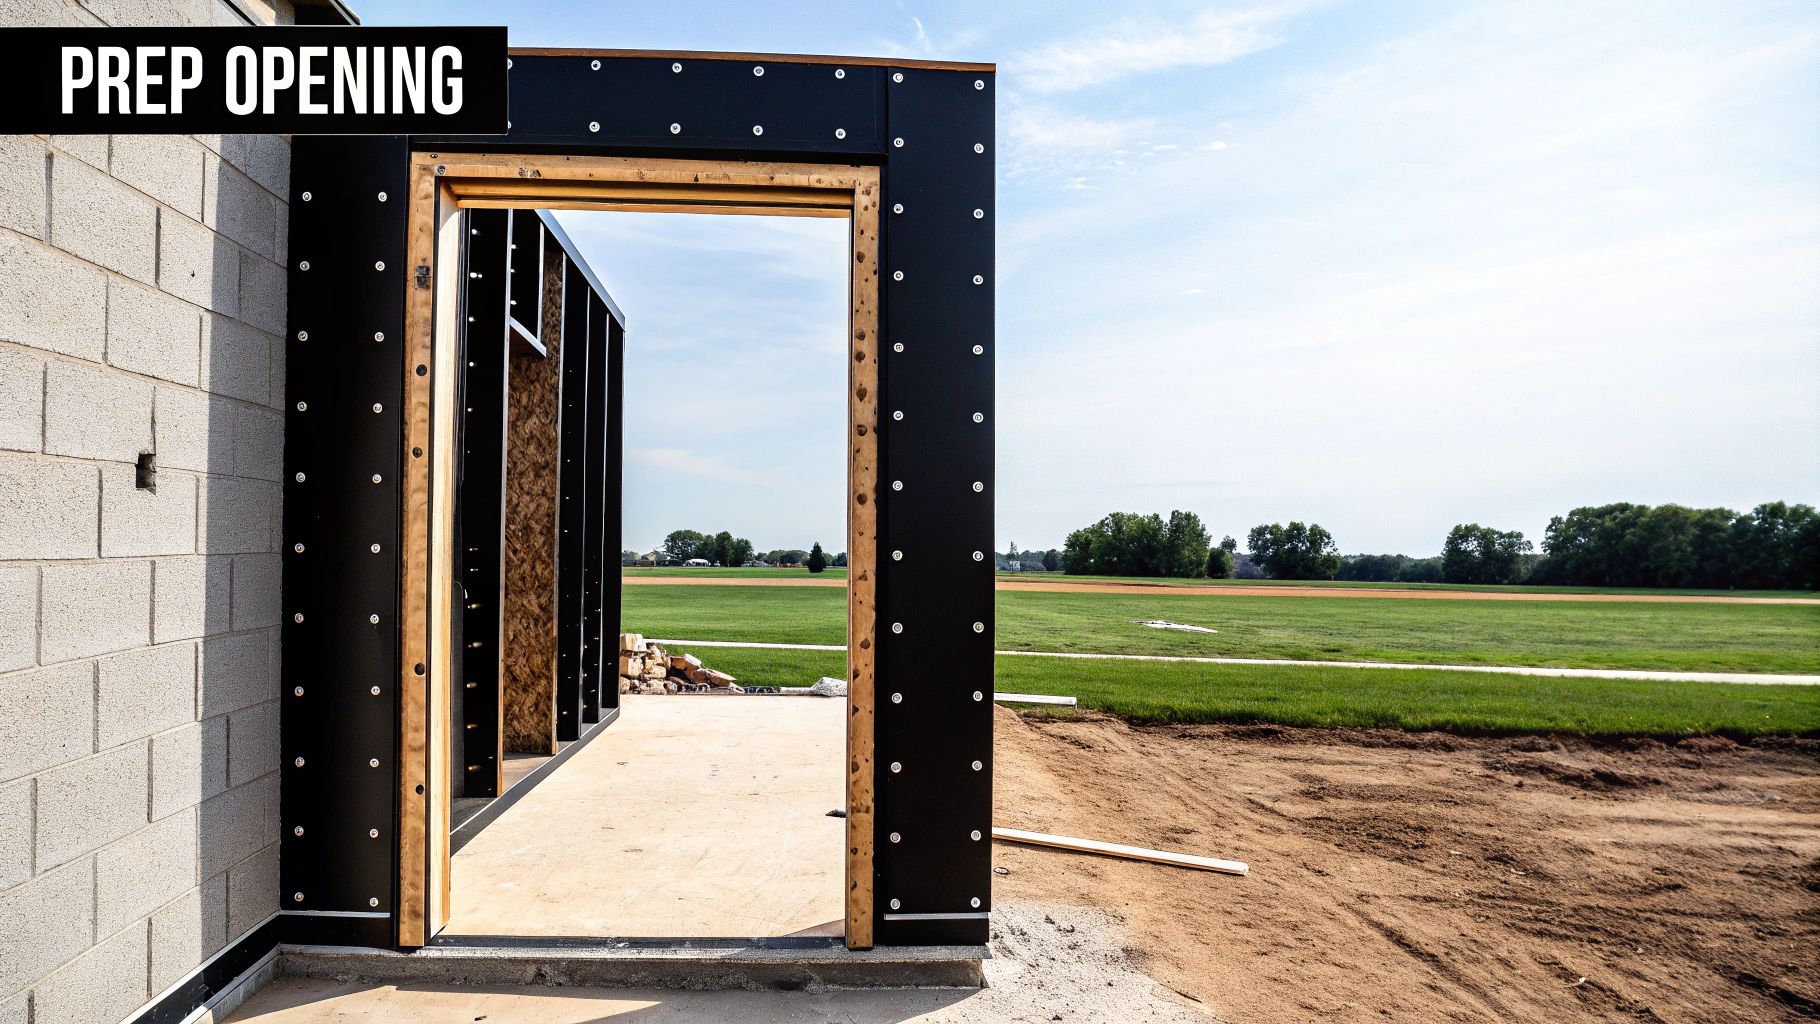
Measuring And Preparing Your Opening Like A Pro
Accurate measurements and thorough preparation are essential for a successful exterior door installation. This crucial first step is often where DIYers run into trouble. This guide provides a professional’s perspective on precise measuring techniques, ensuring your exterior door project gets off to a smooth start. For a deeper dive into the world of door measurements, check out this helpful resource: How to master door measurements.
Taking Accurate Measurements
Start by measuring the width of the rough opening at the top, middle, and bottom. Use the smallest of these three measurements as your rough opening width. Next, measure the height at both sides of the rough opening. Again, select the smallest measurement. These precise measurements will guarantee your new door fits perfectly within the opening.
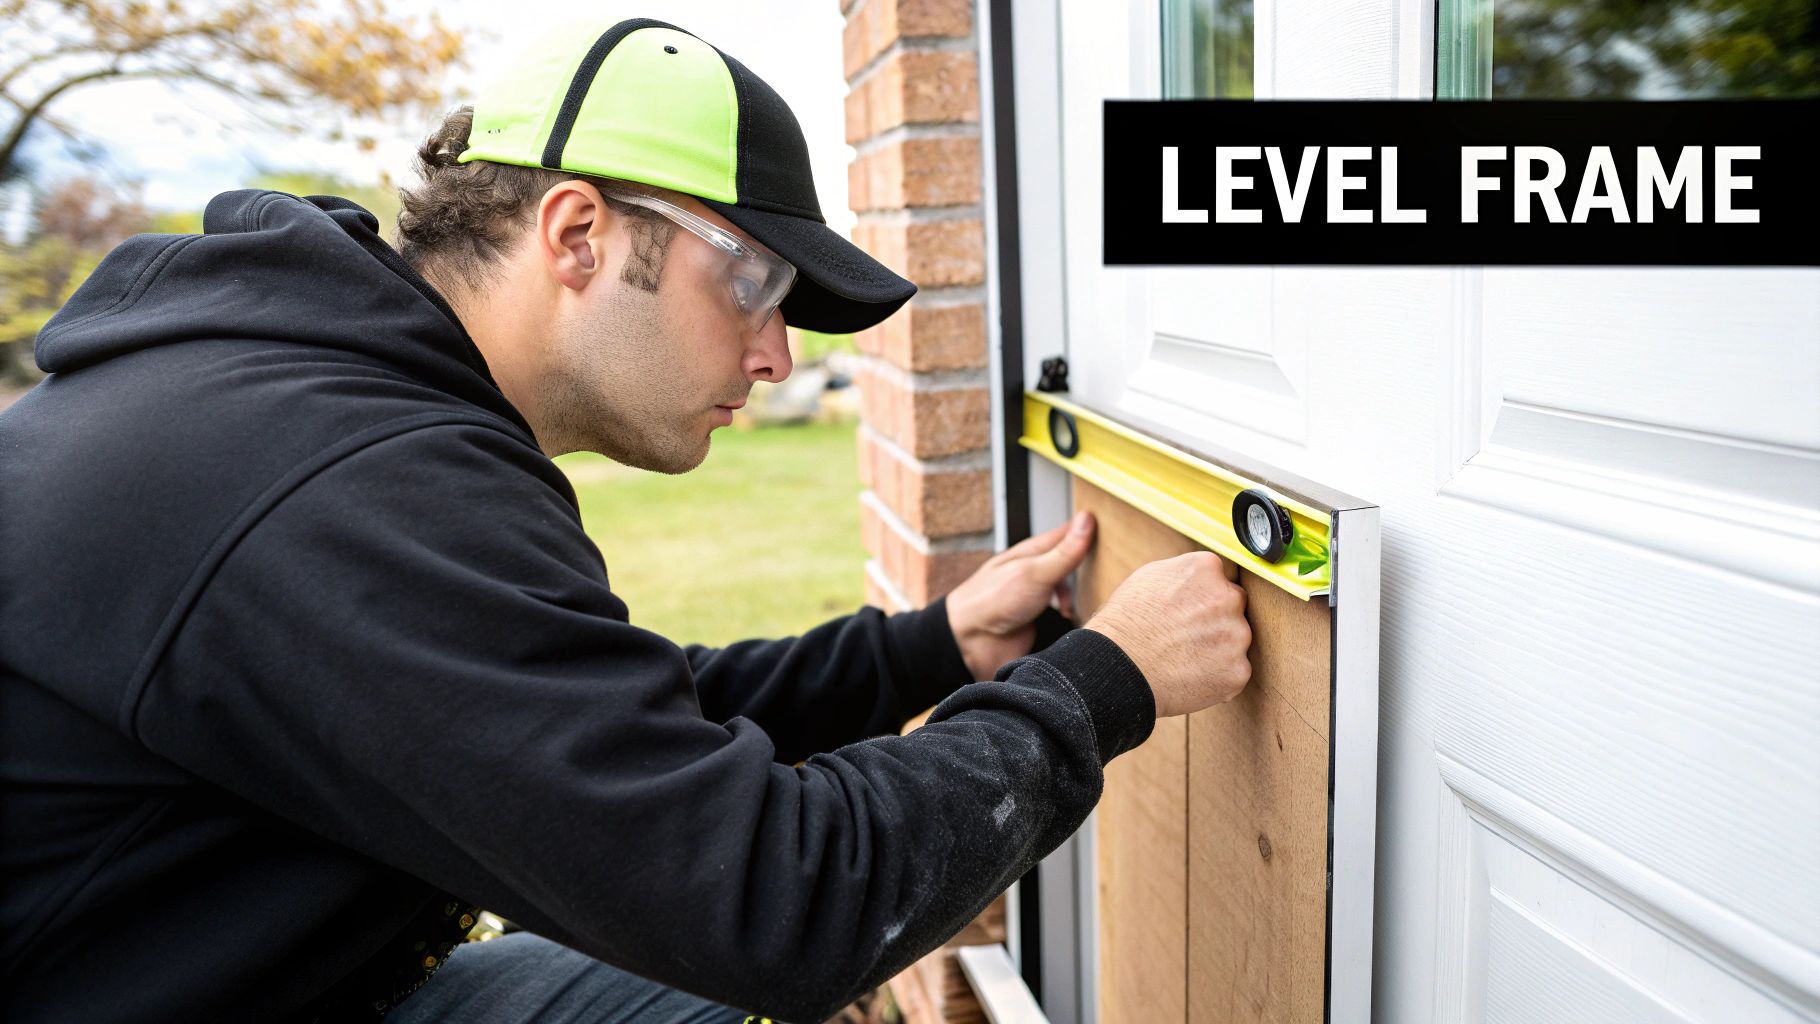
Checking for Square, Level, and Plumb
After measuring, verify the opening is square, level, and plumb. A square opening has identical diagonal measurements. A level opening is perfectly horizontal. A plumb opening is perfectly vertical. These checks are vital for ensuring a smooth-operating door and a tight seal against the weather. Use a level to confirm the sill plate is level and the sides are plumb. If the opening isn't level or plumb, you'll need to use shims during installation.
Identifying and Addressing Potential Problems
Before installing the new exterior door, inspect the rough opening for any problems. Check for signs of settling, warping, or poor previous installation work. Settling can distort the opening, while warping can create gaps and drafts. Addressing these issues now will prevent bigger problems later. Minor issues may require shims or adjustments to the framing. Significant structural problems, however, will need professional repair. This proactive approach helps ensure a durable and problem-free installation. Interestingly, the global market for exterior doors is experiencing significant growth, fueled by construction and urbanization. In 2023, the market was valued between USD 107.35 billion and USD 108.9 billion, and is projected to reach USD 172.38 billion by 2030. You can find more statistics here.
Preparing the Rough Opening
Once you’ve assessed the opening, prepare it for the new door. This includes cleaning the area, removing debris, and ensuring a solid surface for the door frame. You may also need to add flashing tape or seal gaps around the opening. This thorough preparation creates the best foundation for your new door and optimizes its performance. Also, consider protecting your home’s interior. Cover nearby furniture and floors to prevent damage from dust and debris. Finally, create a realistic timeline for the installation based on the condition of your opening. A well-prepared opening and a realistic timeline contribute to a successful and less stressful door installation.
Removing Your Old Door Without The Drama
Installing a new exterior door can be an exciting home improvement project. However, before you can enjoy that new entryway, you'll need to remove the old door. While this might seem straightforward, a careless approach can lead to unwanted damage or even injuries. This guide offers a step-by-step process for a smooth, drama-free removal.
Handling Hinges and Hardware
The first step is removing the hinge pins. If your pins are painted over, use a utility knife to carefully break the seal. A small screwdriver can also work for this task. Then, gently tap the pins upwards using a hammer and a nail set (or a similar tool). This careful approach helps prevent damage to the hinges and the surrounding door frame.
If your door has settled over time, the pins might be a little stubborn. In this case, a pry bar can be helpful. Gently lift the door slightly to create clearance for the pins to come out.
Removing the Door Slab
With the hinge pins removed, the door slab is ready to come out. If you're dealing with a heavy door, having a second person assist with lifting is always a good idea. This minimizes the risk of accidents and potential damage. If you're working solo, support the door with one hand while removing the last hinge pin. This controlled approach prevents the door from falling and potentially causing injury.
Detaching the Frame (If Necessary)
If your project involves replacing the entire door frame, you'll need to detach the existing one. Carefully remove the trim around the frame using a pry bar. Protect your wall by placing a thin piece of wood between the pry bar and the wall surface. Next, locate and remove the screws or nails that secure the frame to the rough opening.
A utility knife is useful for cutting through any sealant between the frame and the opening. For particularly stubborn frames, a reciprocating saw can be a valuable tool. Always work slowly and carefully to avoid damage to the surrounding structure.
Preserving Trim and Protecting Your Home
If you're planning to reuse the existing trim, extra care during removal is essential. Numbering each piece before removal simplifies reinstallation, making it as easy as putting together a labeled puzzle. While the door is out, protect your home's interior from the elements. Cover the opening with a tarp or plastic sheeting. This simple step prevents potential damage from rain, wind, and insects, and also keeps the workspace clean. For tips on handling warped doors, check out this helpful resource: How to master warped door repairs.
Disposing of Old Materials
Finally, remember to dispose of the old door and frame responsibly. Check with your local waste management services, as many communities have specific guidelines for construction debris. Some materials may be recyclable, while others require disposal at a designated landfill. Proper disposal is essential for environmental responsibility and keeps your property looking its best.
By following these steps, you can remove your old exterior door safely and efficiently, minimizing the risk of damage and setting the stage for a successful installation of your new door. Remember, careful preparation is the key to achieving a professional-looking result.
Step-By-Step Installation That Actually Works
Transforming a rough opening into a functional doorway is a rewarding process. We'll break down each step, from frame positioning to final adjustments, explaining the what and why for long-term performance. This guide covers techniques for both pre-hung doors (door already hung in its frame) and slab doors (door only).
Installing the Frame
Accurate placement is crucial for both pre-hung and slab door installations. Carefully position the frame within the rough opening. Use shims to level and ensure it's plumb and square. Shims are essential for perfect alignment and smooth operation, acting like wedges to fill gaps and correct imperfections. This step is particularly important for pre-hung doors to prevent binding and ensure free swinging.
Securing the Frame
Once perfectly positioned, secure the frame to the rough opening with long, exterior-grade screws. These provide a strong, weather-resistant hold, preventing future shifting. Adequate screw length is vital for stability; shorter screws can compromise the door's integrity.
Hanging the Door (For Slab Installations)
For slab doors, hang the door in the newly installed frame. This infographic outlines the process:

This three-step process highlights hinge alignment and proper screw placement for smooth operation. Testing the swing immediately allows for correcting misalignments early on.
Installing the Hardware
With the door hung, install the handleset, deadbolt, and other hardware. Ensure everything operates smoothly and securely. This is the time for final adjustments to the door’s swing and fit. The global exterior door market, valued at USD 107.35 billion to USD 108.9 billion in 2023, is projected to reach USD 172.38 billion by 2030. This growth is driven by construction and urbanization. Learn more about exterior door market growth. Proper hardware enhances security and aesthetics.
Sealing and Insulating
Finally, seal gaps between the frame and rough opening with expanding foam insulation and caulk. This creates a weathertight seal, preventing drafts, moisture, and energy loss. This step maximizes energy efficiency and longevity. Applying weatherstripping enhances insulation and minimizes drafts further.
By following these steps, you'll achieve a professional installation and enjoy a secure, energy-efficient, and beautiful entryway. This approach enhances curb appeal and provides lasting performance.
Weatherproofing That Stands The Test Of Time
A perfectly installed exterior door relies heavily on effective weatherproofing. This isn't just about protection for a single season; it's about ensuring long-term resilience against the elements. We'll explore various weatherstripping materials, smart caulking strategies, and the importance of proper threshold installation to help your door withstand real-world conditions. For those interested in energy-efficient upgrades, check out this helpful resource: How to master energy efficient upgrades.
Choosing the Right Weatherstripping
Weatherstripping is the first line of defense against drafts and leaks. Understanding the different materials and their applications is essential for a well-sealed door.
-
Foam Tape: A budget-friendly and easy-to-install option, foam tape works well for gaps around the door frame. Keep in mind, however, that it's not as durable as other choices.
-
Felt Weatherstripping: Felt is another cost-effective option that provides good insulation. Over time, particularly in high-traffic areas, felt can wear down.
-
Rubber Weatherstripping: Coming in various forms like compression, bulb, or V-shaped, rubber offers excellent durability and creates a tight seal. It's a great choice for areas with friction, such as the sides and top of the door.
-
Silicone Weatherstripping: While similar in performance to rubber, silicone excels in its resistance to extreme temperatures. This makes it a good choice for harsh climates.
To help you choose the right material for your door, take a look at the comparison table below:
To help you choose the right material for your door, we've put together a comparison of common weatherproofing materials. This table outlines their best uses, lifespan, cost, and overall performance rating.
Weatherproofing Materials Comparison
| Material Type | Best Use | Lifespan | Cost | Performance Rating |
|---|---|---|---|---|
| Foam Tape | Gaps around the frame | Short | Low | Good |
| Felt Weatherstripping | Gaps, less friction areas | Moderate | Low | Good |
| Rubber Weatherstripping | Sides and top of door | Long | Moderate | Excellent |
| Silicone Weatherstripping | Extreme temperatures | Very Long | Moderate | Excellent |
As you can see, each material offers a unique balance of cost, durability, and performance. Choosing the right one depends on your specific needs and climate.
Caulking for a Complete Seal
Caulking is crucial for sealing any remaining gaps and cracks around the exterior door frame. It prevents air and water infiltration, contributing significantly to energy efficiency. Be sure to use a high-quality, exterior-grade caulk designed for doors and windows. Apply a continuous bead around the frame for complete coverage, creating a strong barrier against the elements.
Threshold Installation: The Final Barrier
The threshold –– the bottom part of the door frame –– bridges the gap between the interior and exterior. Proper installation is vital for preventing drafts, water leaks, and insect intrusion. Ensure a tight seal between the threshold and the subfloor, and make sure the door sweeps snugly against it. This often-overlooked detail significantly impacts a door's weatherproofing effectiveness.
Avoiding Common Weatherproofing Mistakes
Common mistakes include choosing the wrong weatherstripping material, uneven caulk application, and neglecting the threshold. For instance, using foam tape in high-friction areas will lead to premature wear. Inconsistent caulking creates gaps, compromising the seal. Addressing these seemingly small details makes a big difference in your door's performance and lifespan.
Testing and Maintaining Your Weatherproofing
After installation, test your weatherproofing. A simple test for drafts involves holding a lit candle near the door frame. A flickering flame indicates an air leak. Check for water penetration by spraying water around the frame during rainfall. These tests pinpoint areas needing attention.
Seasonal adjustments to your weatherstripping can maintain optimal performance. In colder climates, consider using thicker weatherstripping in the winter and thinner in the summer. This proactive approach ensures effective insulation year-round and extends the life of your weatherstripping.
By understanding the different weatherproofing materials and techniques, and by avoiding common mistakes, you can ensure your exterior door provides years of comfort, security, and energy savings. The global doors market, valued at USD 147.66 billion in 2024, demonstrates the growing importance of well-installed and weatherproofed exterior doors. You can explore more detailed market statistics here.
Final Touches And Quality Assurance
The difference between a good exterior door installation and a great one lies in the details. This guide walks you through the crucial final steps, from hardware installation to ensuring a smooth, secure, and quiet door operation.
Hardware Installation and Adjustments
Once the door and frame are in place, it's time for the hardware. This includes the handleset, deadbolt, and any extras like a peephole or door knocker. Make sure everything is installed securely and functions properly. This is your opportunity to make small adjustments for optimal performance.
-
Handleset Installation: Follow the manufacturer's instructions carefully, paying close attention to the alignment of the latch bolt and strike plate.
-
Deadbolt Installation: Install the deadbolt, making sure it extends and retracts smoothly into the strike plate. A properly installed deadbolt is vital for home security.
-
Other Hardware: Install additional hardware like peepholes or door knockers, ensuring they are positioned correctly and securely attached.
Door Swing and Lock Alignment
A smoothly swinging door is the mark of a professional installation. Check for any sticking or binding. Adjust the hinges as needed to achieve a free and easy swing. Verify the lock and deadbolt alignment for smooth engagement and disengagement. For helpful tips, check out this guide on how to adjust a door.
-
Hinge Adjustment: If the door sticks, slightly loosen the hinge screws and use shims to reposition the door. Tighten the screws once the swing is corrected.
-
Lock Adjustment: If the lock or deadbolt doesn't align correctly, check the strike plate. You may need to adjust its position or slightly enlarge the opening.
Quality Assurance Checklist
A checklist ensures every aspect of the installation meets professional standards. This helps identify and address potential issues before they become major problems. Consider it your final inspection before enjoying your new door.
-
Operation: Does the door open and close smoothly without sticking or binding?
-
Lock Functionality: Do the lock and deadbolt engage and disengage easily and securely?
-
Weatherstripping: Is the weatherstripping creating a tight seal to prevent drafts and leaks?
-
Threshold: Is the threshold properly sealed, and does the door sweep against it effectively?
-
Hardware: Is all hardware securely fastened and working correctly?
-
Appearance: Does the overall appearance of the door and frame look clean and professional?
Addressing Common Adjustment Needs
Even with a perfect installation, minor adjustments might be necessary as the door settles, especially in the first few weeks. Be mindful of changes in the door's swing or lock operation.
-
Seasonal Changes: Wood doors, particularly, can react to humidity changes. Monitor the door's swing throughout the year and make adjustments as needed.
-
Tightening Hardware: Regularly check and tighten all hardware to maintain optimal performance and security.
This meticulous approach ensures your DIY exterior door installation is secure, energy-efficient, and visually appealing.
Looking to upgrade your home's entrance? Gladiator Window and Doors offers high-quality, custom doors at competitive prices. Specializing in extra-large sliding doors, pivot doors, bi-fold doors, and panoramic doors, along with fully loaded pergolas, they have something for every home. Explore their selection and Best Offer Guarantee today to transform your entryway.


